Notebook Workflow#
In this course I set things up using Jupyter Notebooks. I will use these for lectures and assignments. I find that this is a good workflow for scientific computing. For a big project I will use notebooks in several different ways.
Development notebooks#
These are like lab notebooks. You use them as scratch space to try out ideas. Once you have working code, you encapsulate it in functions. You then leave a record of testing the functions.
After the development is complete, and you are ready for production, you either copy the code into a new production notebook, or you copy it into a text file “whatever.jl”. You can load that code into your production notebook with include("whatever.jl"). If it is a more sophisticated set of tools, you can turn it into a package and import by typing using whatever.
You can extract the code from a development notebook by clicking on File, and selecting Download as .jl.
Some people like to have both a text editor and a notebook open at one time. They make edits to the .jl file, and lode it in with include. They then do all of their interactive debugging in the notebook.
Every once and a while you need to clean up your development notebook – or even copy it over to a completely new notebook to get rid of all the dead ends. It is good practice, however, to leave in place the work you did to verify that everything is working correctly. That way if you make a change you can run the same tests. This is an informal version of the “unit test” paradigm.
Presentation notebooks#
You often want to share your code and results with collaborators. One strategy is to use presentation notebooks. This is similar to my lectures. You put fully debugged code (or include it from text files), and run the relevant parts of it to illustrate the physics. One can tweak it on the fly to do further explorations – and include dynamical GUI’s where you push sliders around.
Static views of the notebook can be shared by using nbviewer. Dynamic views can be shared using web services like binder.
Production notebooks#
Once you have working code, you often want to keep the production runs separate from the development work. For code that runs relatively quickly (minutes to hours), you can comfortably do this from notebooks. Make sure that any data which takes more than a couple minutes to produce is saved to disk. Don’t rely on the notebook’s record as a way to save data.
Either copy your development code to the production notebook, or load it in with include.
Scripts#
If you are going to be running code overnight, or you might be running on multiple machines, then it is convenient to use scripts instead of a notebook. Put all of the code in a whatever.jl file, and run it with julia whatever.jl. Make sure that any data is saved to a file. If you are using a Unix environment (including linux or Mac OSX), you can redirect standard output and standard error into text files by julia code.jl >code.out 2>code.err. I would recommend against using standard output for results.
Jupyterlab#
In the past I have had students work with our notebooks within the environment called “Jupyterlab”. It provides a graphical interface with Jupyter notebooks, text files, interactive sessions and output windows. It is a good cross-platform option for working with notebooks.
This semester I would like to jump between Jupyterlab and VSCode.
VSCode#
This semester I am going to sometimes use VSCode to present my notebooks, and at times encourage students to use it for working with them. The main reason for doing this is that it integrates well with AI tools.
Installing VSCode
Go to the Visual Studio Code download page and choose the version for your operating system (macOS, Windows, or Linux). Download the installer and run it.
On a Mac, open the downloaded .zip, drag Visual Studio Code.app into your Applications folder, and then launch it. On Windows, run the installer and accept the default options. On Linux, install from the package provided for your distribution.
After opening VSCode, install the Jupyter and Julia extensions from the Extensions panel so that you can open notebooks and run Julia code inside them.
Other IDEs#
VSCode is a light-weight “Integrated Design Environment.” There are, however, a large number of other options, and I encourage you to explore some of them.
AI workflow#
We are going at times to work with GitHub Copilot which gives access to a range of AI models.
Signing up for Copilot through GitHub Education.
- Create a GitHub account
Go to github.com and make an account if you do not already have one. - Complete your GitHub profile
Add your full name and a profile photo in account settings. This can help with student verification. - Go to GitHub Education
Open education.github.com and find the student benefits application. - Apply as a student
Start the student application and sign in with your GitHub account. - Submit proof of student status
You may be asked for one or more of the following:- A school-issued email address
- A student ID
- A class schedule or enrollment letter showing the current term
- Fill in all school details carefully
Enter your school name and expected graduation date exactly as shown on your documents. If uploading images, make sure they are clear and readable. - Wait for approval
GitHub will email you when your application is approved. Approval is often quick, but it may take a few days. - Activate your Copilot student benefit
After approval, go to your GitHub account benefits or billing area and enable Copilot. - Set up Copilot in VS Code
Install the GitHub Copilot extension in VS Code and sign in with the same approved GitHub account. - Verify it works
Open a code file and check that Copilot is active by trying a suggestion or chat prompt.
Troubleshooting
- School email not accepted: Use document-based verification instead.
- Application delayed: Recheck email (including spam) for messages from GitHub.
- Copilot still locked after approval: Sign out and back in to GitHub in VS Code, then refresh account benefits.
- Wrong account in VS Code: Make sure VS Code is signed into the same GitHub account that received student approval.
You may want to install Copilot CLI which is the stand-alone client, so you can access copilot outside of VS Code. You may find Copilot CLI good for general purpose computer debugging. For example using a prompt like “I have and old Anaconda distribution that I use for Jupyter. I installed IJulia, but the Julia kernel is not appearing in the notebook. How can I fix this?”
Turning off AI “tab completion” suggestions in VSCode#
Inside VSCode there are a number of ways to interact with the AI. One is context based: As you type it will make suggestions. A second is that you can open a chat menu. You open it by clicking on an icon at the top of the page. Inside the chat you can select the type of interaction that you want: Agent, Ask, or Plan. You can also select which model you use. The different models have varying degrees of competence and varying degrees of cost. Getting a clear story about them is tough. Roughly speaking the more expensive the model the more competent it is likely to be. The models are also constantly changing, so it is not clear how useful any advice that I give you will be.
When you install Copilot with VSCode it has an interesting feature where it does “tab completion”. As you type it will make suggestions for the code. You just type “tab” if you want to accept the suggestions.
I find these inline AI suggestions to be impressive, but also distracting. Sometimes I am amazed that it seems to know what I am going to type. More often I find that it is just visual clutter. To turn off these suggestions you can click on the button on the bottom right of the screen:
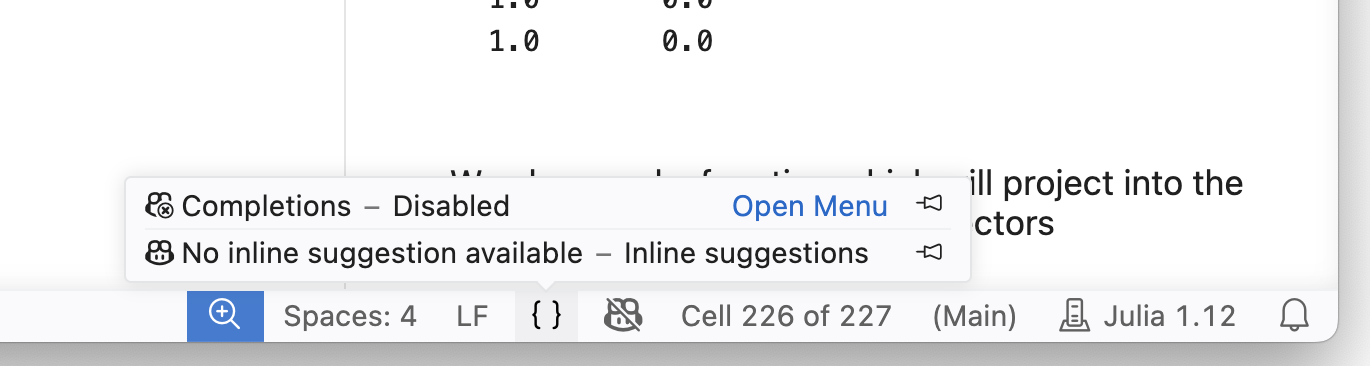
I read somewhere that for the GitHub copilot education benefits you get unlimited tab completion, with no token use. Again, I find this more anoying than helpful, but your mileage may vary.
Prompt Engineering#
A good strategy for writing prompts is to start with giving the context. Then give the general goal. Finish up with details.
You can try to tailor things exactly for your use case. For example:
I am a student in a computational physics class. I am working through a structured Jupyter notebook which is guiding me through writing a program to simulate the kinetics of a gas of hard spheres. I am stuck on a question which is asking me to find the time that it would take for a ball to reach the wall. I am trying to figure out the best way to implement this. Can you make suggestions? I am trying to learn how to do this, so please do not simply give me the answer.
The most common thing you might do is
Can you explain the error message
or
Can you fix the error which lead to that error message
The AI integrated into VSCode can edit your notebooks, and can find the error messages.